
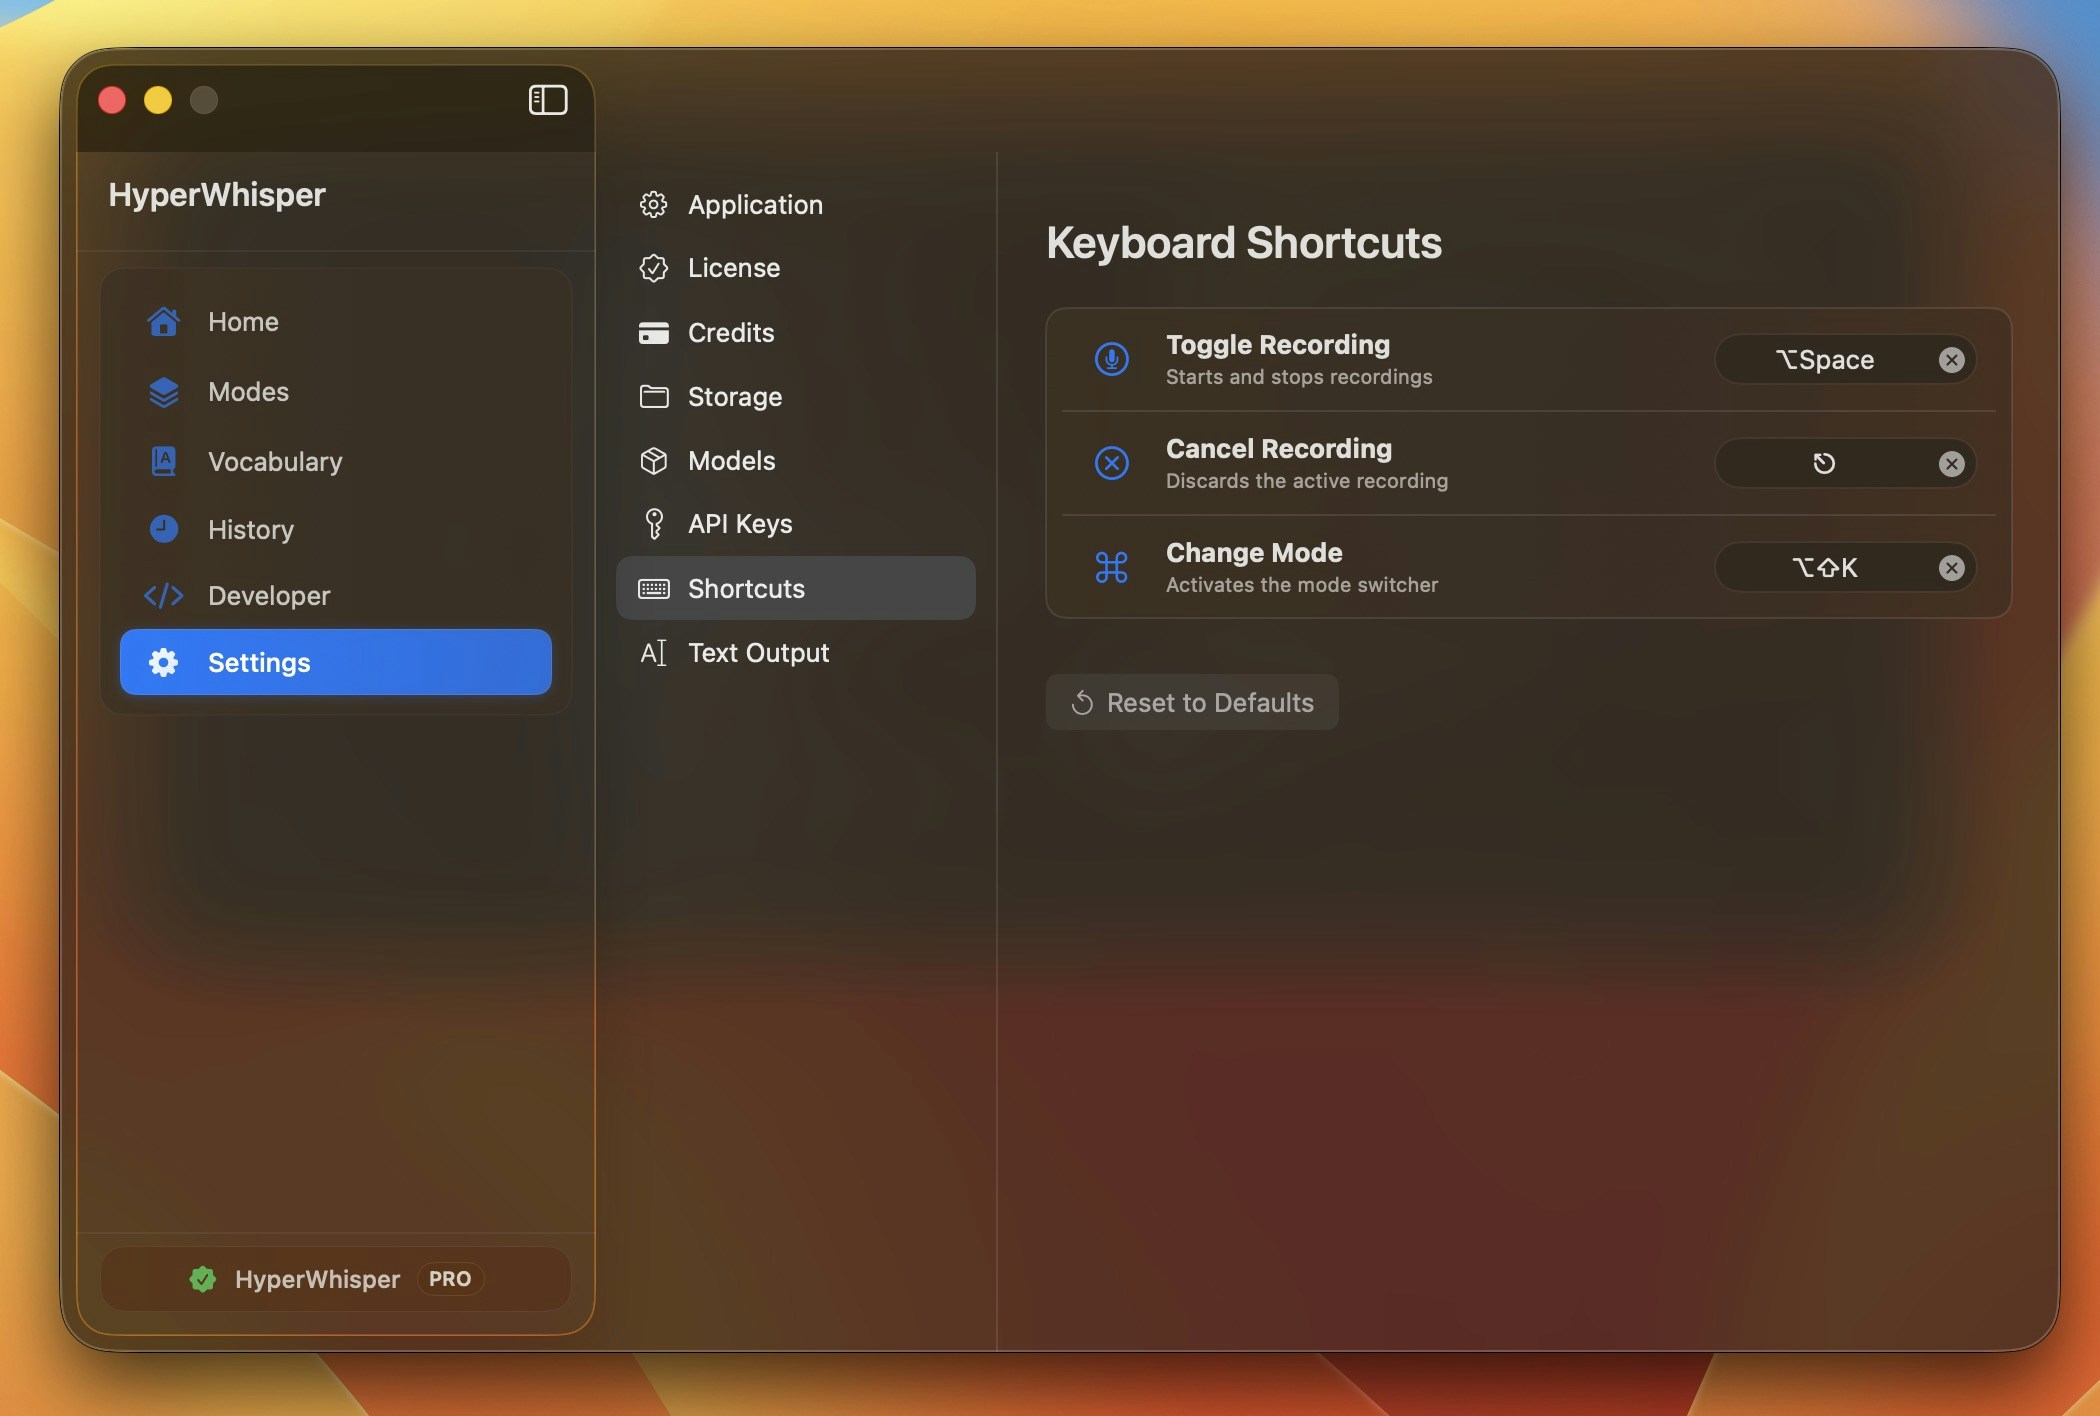
Default Global Shortcuts
- macOS
- Windows
- Linux
These shortcuts stay active in all apps. They also stay active when you quit to the menu bar.
Recording Activation Modes
You can start recording in three ways:- Toggle — Press the shortcut one time to start. Press it again to stop. Your hands stay free while HyperWhisper records.
- Push-to-talk (hold) — Hold a key or a modifier to record. Release it to stop. Use this mode for short recordings, because recording cannot stay on.
- Double-press to lock — Tap the push-to-talk key two times quickly to lock recording on. Tap two times again to stop. This mode gives you hands-free recording, and you do not change to the toggle shortcut.
Customizing Shortcuts
- macOS
- Windows
- Linux
1
Open Shortcuts settings
Go to Settings → Keyboard Shortcuts.
2
Record a new key combination
Click the recorder control next to the action you want to change. Then press the new key combination.
3
Correct conflicts
HyperWhisper marks a conflict immediately. If macOS rejects your key combination, select a combination that is not in use.
4
Reset the shortcuts
To return all shortcuts to their default values, click Reset to Defaults at the bottom of the card.
Push-to-Talk
With push-to-talk, you hold a key to record. When you release the key, recording stops and transcription starts. Push-to-talk operates like a walkie-talkie. Use it for short recordings when you want exact control.Turn on push-to-talk and select a trigger key
- macOS
- Windows
- Linux
Go to Settings → Keyboard Shortcuts. Then turn on the Push to Talk toggle.Then select your trigger key from the mode picker:
Bare modifier modes (FN, Control, Option) need Accessibility permission. macOS supplies raw modifier key events only through the Accessibility API. If the permission is missing, HyperWhisper asks you for it. For the steps, see Permissions.
Push-to-talk has a 250 ms activation delay before recording starts. This delay ignores the modifier keys of normal shortcuts, for example
⌘C to copy. These shortcuts do not start a recording session. macOS, Windows, and Linux all use the same 250 ms delay.Double-press to lock
When double-press is on, two quick taps on the push-to-talk key lock recording on. You do not hold the key. Two more taps stop the recording.- macOS
- Windows
- Linux
The Double press to lock recording toggle is in Settings → Keyboard Shortcuts, below the push-to-talk card. It is on by default. It appears only when your push-to-talk mode is one modifier key (FN, Control, Left Option, or Right Option). The combination modes (FN + Control, FN + Left Option) and Custom mode do not have double-press lock.
Minimum lock time before you can unlock
After the lock starts, HyperWhisper ignores the unlock sequence for a short time. This delay stops a key bounce, or a dropped packet from a wireless keyboard, from unlocking the recording immediately after it locked.
If you tap two times before this time, HyperWhisper stays locked. Wait, then tap two times again.
On Windows and Linux, HyperWhisper waits 100 ms after you release the push-to-talk key. It then reads the key again before it stops the recording. This delay keeps a recording alive when a wireless keyboard drops a packet during a hold. macOS has no such delay, because it filters the key on both edges before the event.
Quick Capture (macOS)
Quick Capture is a macOS feature. It sends a transcription to a new Apple Notes note, and not to your focused app. With Quick Capture, you can record an idea and stay in your current app.Configure Quick Capture
1
Turn on Quick Capture
Go to Settings → Keyboard Shortcuts. Then turn on the Quick Capture toggle.
2
Assign a shortcut
A shortcut recorder appears below the toggle. Click the recorder. Then press the key combination that you want.
3
Select a mode
The mode picker sets the transcription mode for Quick Capture. Select one mode, or select Selected mode to always use your active mode.
4
Give Notes automation permission
The first time Quick Capture runs, macOS asks if HyperWhisper can control Apple Notes. Click OK. If you denied the permission, go to System Settings → Privacy & Security → Automation. Then turn on the access of HyperWhisper to Notes.
If the automation permission is denied, a warning banner appears in the Quick Capture settings card. The banner gives the steps to turn the permission on again in System Settings.
Menu Bar Icon & Status (macOS)
HyperWhisper stays in the macOS menu bar. For the full list of menu items, see Menu Bar & Tray Controls. That page also describes mode selection, microphone selection, and the system tray on Windows. The icon changes to show the current state:
The icon also has an accessibility label. Screen readers speak this label as “Recording”, “Processing”, or “Idle” for the current state.
What the menu contains
Click the menu bar icon to open the HyperWhisper menu. The menu contains these items:- Start / Stop Recording — starts or stops the recording session. The item shows your shortcut on the right. When push-to-talk is on and no toggle shortcut is set, the item shows a hold hint such as “Hold FN” or “Hold ⌃”.
- History — opens the main window to the recording history.
- Settings — opens the main window to Settings.
- Microphone — a submenu with all input devices. A checkmark marks the active device. The system default input has a “(Default)” label.
- Select Mode — a submenu with all your modes. A checkmark marks the active mode.
- Transcribe File — a submenu with your modes. When you select a mode, a file picker opens. You can then transcribe an audio file or a video file with that mode.
- Help Center / Contact Support / Feedback — links to the documentation and the support portal.
- Version — shows the app version. This item is dimmed, and you cannot click it.
- Quit — closes HyperWhisper.
System Tray Icon & Status (Windows)
On Windows, HyperWhisper shows an icon in the system tray. A double-click on the icon opens the main window. A right-click on the tray icon opens a context menu. This menu has the same items as the macOS menu bar:- Start / Stop Recording
- History
- Settings
- Microphone submenu
- Select Mode submenu
- Transcribe File submenu
- Help Center / Contact Support / Feedback
- Check for Updates
- Version label
- Quit
Troubleshooting Shortcuts
- A shortcut does not respond — other apps or macOS take some key combinations, most of all the bare function keys. Add one modifier or more (
⌥,⌃, or⇧) to prevent conflicts. - Push-to-talk does not start — on macOS, the bare modifier modes (FN, Control, Option) need Accessibility permission. Open System Settings → Privacy & Security → Accessibility. Then make sure that HyperWhisper is in the list and is turned on. You do not need to start the app again: HyperWhisper watches for the new permission for 10 minutes and arms push-to-talk as soon as it finds it. If you take more than 10 minutes, select the push-to-talk mode again in Settings → Keyboard Shortcuts, or start the app again.
- No shortcut works after a hidden start (macOS) — HyperWhisper registers the shortcuts at launch, and it does not need the main window. A login-item start with Launch minimized on gives you working shortcuts immediately. Older versions registered the shortcuts only when the main window appeared, so the record shortcut stayed dead until you opened the window. If you see that behavior, update to the current version.
- Windows shortcut conflict — when two actions have the same key combination, a warning banner appears in Settings → Shortcuts. Correct the conflict before you save.
- No shortcut works on Linux — HyperWhisper reads global shortcuts from
/dev/input, which needs thehyperwhisper-inputgroup. Runid -nG | tr ' ' '\n' | grep -x hyperwhisper-inputin a terminal. If the command prints nothing, add the group, then log out completely and log back in. See Install HyperWhisper on Linux. - A Linux shortcut is not saved — the field keeps its previous value when Linux refuses a combination. Read the reason below the field. A key with no modifier must be a function key or Esc.